Yes, you can successfully bottom water terracotta pots, provided you adjust your technique to accommodate the porous nature of unglazed clay. Because terracotta breathes, moisture evaporates through the container walls much faster than it does in plastic or ceramic vessels. Bottom watering offers a reliable way to hydrate the entire root ball evenly without compacting the topsoil surface.
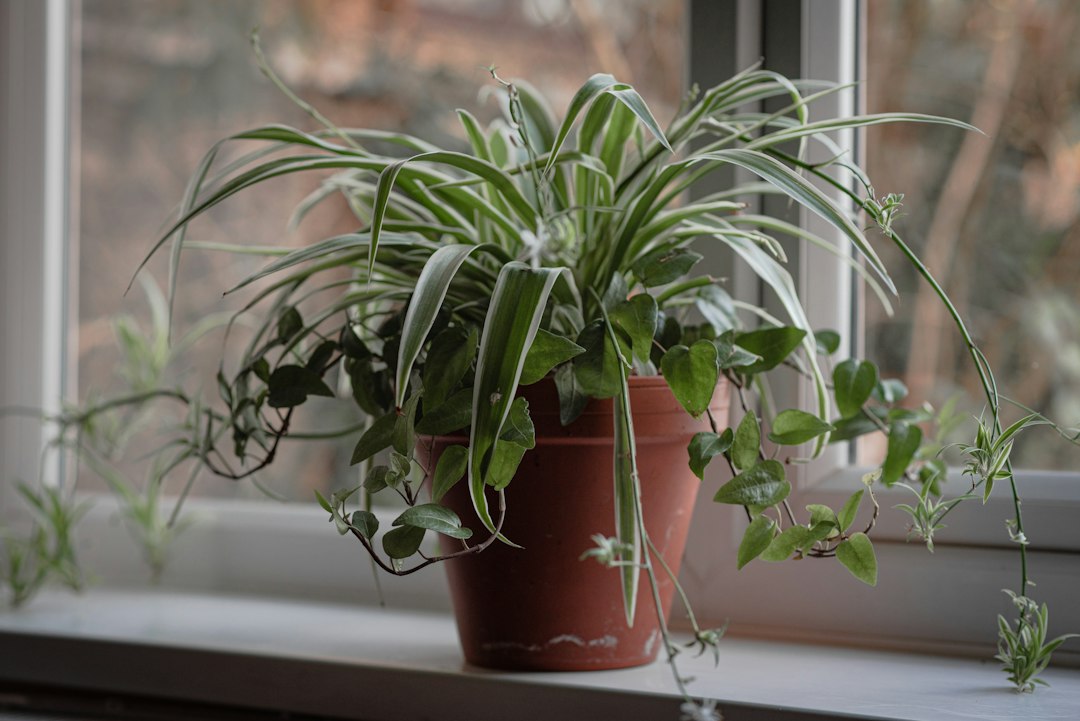
The process involves placing the unglazed pot into a shallow basin filled with clean water, allowing the growing medium to absorb moisture upward through the bottom drainage hole via capillary action. This method prevents dry pockets from forming within dense potting mixes and protects delicate stem bases from prolonged surface moisture that can trigger fungal decay.
However, mastering this technique requires understanding how clay interacts with water, salts, and drying cycles. While highly beneficial for many indoor and balcony container plants, bottom watering terracotta demands careful timing to prevent mineral buildup and ensure the porous walls do not wick away moisture too quickly during the absorption phase.
Mechanics of Sub-Irrigation in Porous Clay
Porosity and Evaporation Dynamics
Unglazed terracotta possesses a highly porous microstructure containing countless microscopic air pockets. When submerged partially in water, the clay acts as a conduit, drawing moisture inward while simultaneously allowing air and vapor to escape freely into the surrounding atmosphere.
This rapid vapor transmission means that moisture levels fluctuate significantly faster than in sealed containers. Monitoring the outer wall of the pot often reveals a visible dampness line, indicating how far the moisture has traveled upward through the clay matrix during the watering process.
Selecting the Correct Basin
Choosing an appropriate vessel for sub-irrigation is essential for stability and effective water uptake. The container must be wide enough to accommodate the base of the terracotta pot comfortably while remaining shallow enough to control the exact water depth.
Saucers, deep trays, or dedicated waterproof storage bins work exceptionally well. Ensure the inner surface is clean to prevent debris or pathogens from entering the pot drainage hole and potentially compromising the health of the plant root system over time.
Water Depth and Immersion Timing
Managing water levels correctly prevents both under-saturation and accidental root asphyxiation. The water line in your basin should typically sit between one-quarter and one-third of the total height of the terracotta pot, ensuring that the upper root zone still receives adequate oxygen exchange.
Most standard houseplant pots require between twenty
to forty-five minutes of immersion to achieve full saturation. Leaving the pot submerged longer than necessary can waterlog the lower soil layers, leading to oxygen depletion and potential root stress in sensitive species.
Soil Moisture Dynamics and Capillary Action
Upward Moisture Migration
Capillary action relies on the adhesive and cohesive properties of water moving through tiny spaces between soil particles. When the bottom drainage hole contacts water, the dry potting mix pulls moisture upward, defying gravity to wet the entire vertical column of earth.
The speed of this upward migration depends heavily on the texture and composition of your potting medium. Finer ingredients like peat and coco coir facilitate rapid wicking, whereas coarser amendments like perlite and bark slow the capillary flow down considerably.
Preventing Dry Soil Pockets
Top watering frequently fails in dried-out terracotta because hydrophobic soil channels water straight down the inner walls, leaving the center bone dry. Sub-irrigation bypasses this issue entirely by forcing moisture inward from the base, rehydrating compressed root balls uniformly.
If a potting mix has become severely dehydrated, the initial bottom watering session may require a slightly longer duration. Checking the weight of the pot before and after soaking provides a reliable indicator of whether the core has absorbed sufficient moisture.
Managing Mineral Salt Accumulation
Bottom watering inherently draws dissolved fertilizers and tap water minerals upward toward the soil surface as moisture evaporates. Over time, this creates a visible white crust of mineral salts along the rim of the terracotta pot and on the topsoil layer.
To prevent root burn from accumulated salts, periodically flush the pot from the top using clean, unfertilized water. Allow this rinse water to drain completely out the bottom hole, effectively resetting the chemical balance within the root zone.
Plant Selection and Root Health Considerations
Ideal Species for Clay Sub-Irrigation
Many popular indoor foliage plants and balcony containers thrive when their terracotta homes are bottom watered. Species that prefer steady, moderate moisture levels without constant top-surface wetness benefit greatly from this measured approach to hydration.
Foliage varieties and species sensitive to crown rot, such as African violets and certain ferns, respond exceptionally well. Keeping the foliage and upper soil dry minimizes the risk of fungal leaf spots and stem rots frequently caused by splashing overhead water.
Accommodating Drought-Tolerant Plants
Succulents, cacti, and other arid-region species planted in terracotta require cautious management during sub-irrigation. Because these plants rot easily in stagnant moisture, immersion times must be strictly limited to prevent the soil from holding excess water for too long.
Allow the terracotta pot to dry out completely between watering sessions. The combination of porous clay and controlled bottom watering mimics natural soak-and-dry moisture cycles, encouraging deep, robust root growth without inviting fungal pathogens.
Protecting Root Systems from Shock
Sudden shifts in moisture levels can shock delicate root hairs, leading to wilting or leaf drop. Maintaining observant moisture management helps protect the plant root system as it adjusts to the specific drying rate dictated by the terracotta container’s unique porosity.
Temperature of the soak water also plays a crucial role in preventing root stress. Always use room-temperature water rather than ice-cold tap water, ensuring the root cells continue functioning normally during the active absorption phase.
Operational Best Practices and Maintenance
Checking Saturation Levels Safely
Determining when a bottom-watered pot has finished absorbing moisture requires more than a simple visual glance at the surface. Lift the pot slightly to gauge its weight, or gently press a finger into the topsoil to feel for coolness and dampness.
When the upper root zone feels cool and slightly damp, or once the target immersion window has elapsed, the capillary process is complete. Promptly remove the pot from the basin and let any excess runoff drip away before returning the container to its decorative saucer or display spot.
Cleaning and Descaling Terracotta Pots
The porous nature of unglazed clay allows mineral deposits, algae, and mineral salts to penetrate the vessel walls over time. Regular cleaning prevents these accumulations from harboring pests or restricting the vital airflow required by healthy plant roots.
Scrub empty terracotta pots using a stiff brush and a solution of mild soap or diluted white vinegar. Rinse thoroughly and allow the clay to dry completely before repotting to ensure no chemical residues harm the incoming plant.
Adjusting Routines for Seasonal Changes
Ambient temperature and indoor humidity drastically alter how quickly terracotta pots dry out throughout the year. During warm summer months, watering frequency typically increases to match accelerated evaporation rates driven by higher temperatures and active plant growth.
Conversely, reduced winter sunlight typically slows plant metabolism and growth, often extending the intervals needed between watering sessions even if indoor heating dries the air. Always rely on physical soil checks and pot weight rather than a rigid calendar schedule to determine when sub-irrigation is necessary.
Frequently Asked Questions
How often should I bottom water terracotta pots?
There is no universal schedule for bottom watering terracotta containers because drying speeds vary based on plant size, room temperature, and humidity. Instead of counting days, lift the pot or test the soil depth to gauge moisture levels accurately.
To test readiness, insert a wooden skewer deep into the root zone or gauge container heft by hand. Moisture-loving tropicals generally require soaking once the top inch feels dry, whereas drought-tolerant varieties should dry out across the majority of the root ball before sub-irrigation.
Can I add liquid fertilizer to the bottom watering basin?
Yes, you can mix water-soluble fertilizer into your soak water, but do so with caution. Because bottom watering draws moisture upward, nutrients are distributed evenly throughout the root zone without scorching surface roots.
However, because this method concentrates mineral salts over time, alternate your fertilized soaks with plain water rinses. Periodically flushing the pot from above washes away excess fertilizer residue, preventing chemical burn and root damage.
What should I do if the terracotta pot is too heavy to lift for soaking?
Large floor-standing terracotta pots present a distinct challenge for traditional bottom watering basins. For oversized containers, use a large turkey baster or siphon hose to add measured water directly into a deep saucer beneath the pot.
Alternatively, you can water slowly around the outer rim of the soil surface to encourage inward capillary movement. Ensure the saucer never remains filled with stagnant standing water for more than an hour to protect the lower roots from decay.
Why does my terracotta pot tip over or float when I place it in the bottom watering basin?
Terracotta pots can tilt, slide, or shift if the water level in your basin is too high or if the interior potting mix is excessively dry and lightweight. Because unglazed clay walls trap air within their microscopic pores and dry soil contains pockets of trapped gas, empty-feeling containers often lack sufficient weight until they begin pulling moisture upward.
To prevent accidental tipping, keep the initial water depth shallow—measuring no more than an inch or two—until the base of the pot absorbs enough liquid weight to stabilize itself. You can also gently steady the container by hand during the first few minutes of immersion or use a stable, flat-bottomed container that prevents the pot from listing to one side.
Can you bottom water newly repotted plants in terracotta pots?
It is generally best to avoid bottom watering immediately after repotting a houseplant into a terracotta container. Freshly disturbed root systems require adequate time to recover from transplant stress, and the loose, unsettled potting mix surrounding them frequently lacks the tight particle-to-particle contact required to drive efficient upward capillary action.
For the initial hydration following a repotting procedure, apply clean water gently from the top using a narrow spout. This traditional top-down approach helps wash fine soil particles into place, settling the fresh mix firmly around the root ball and eliminating large subterranean air pockets. Once the plant establishes itself over two to four weeks, you can safely transition to routine sub-irrigation.